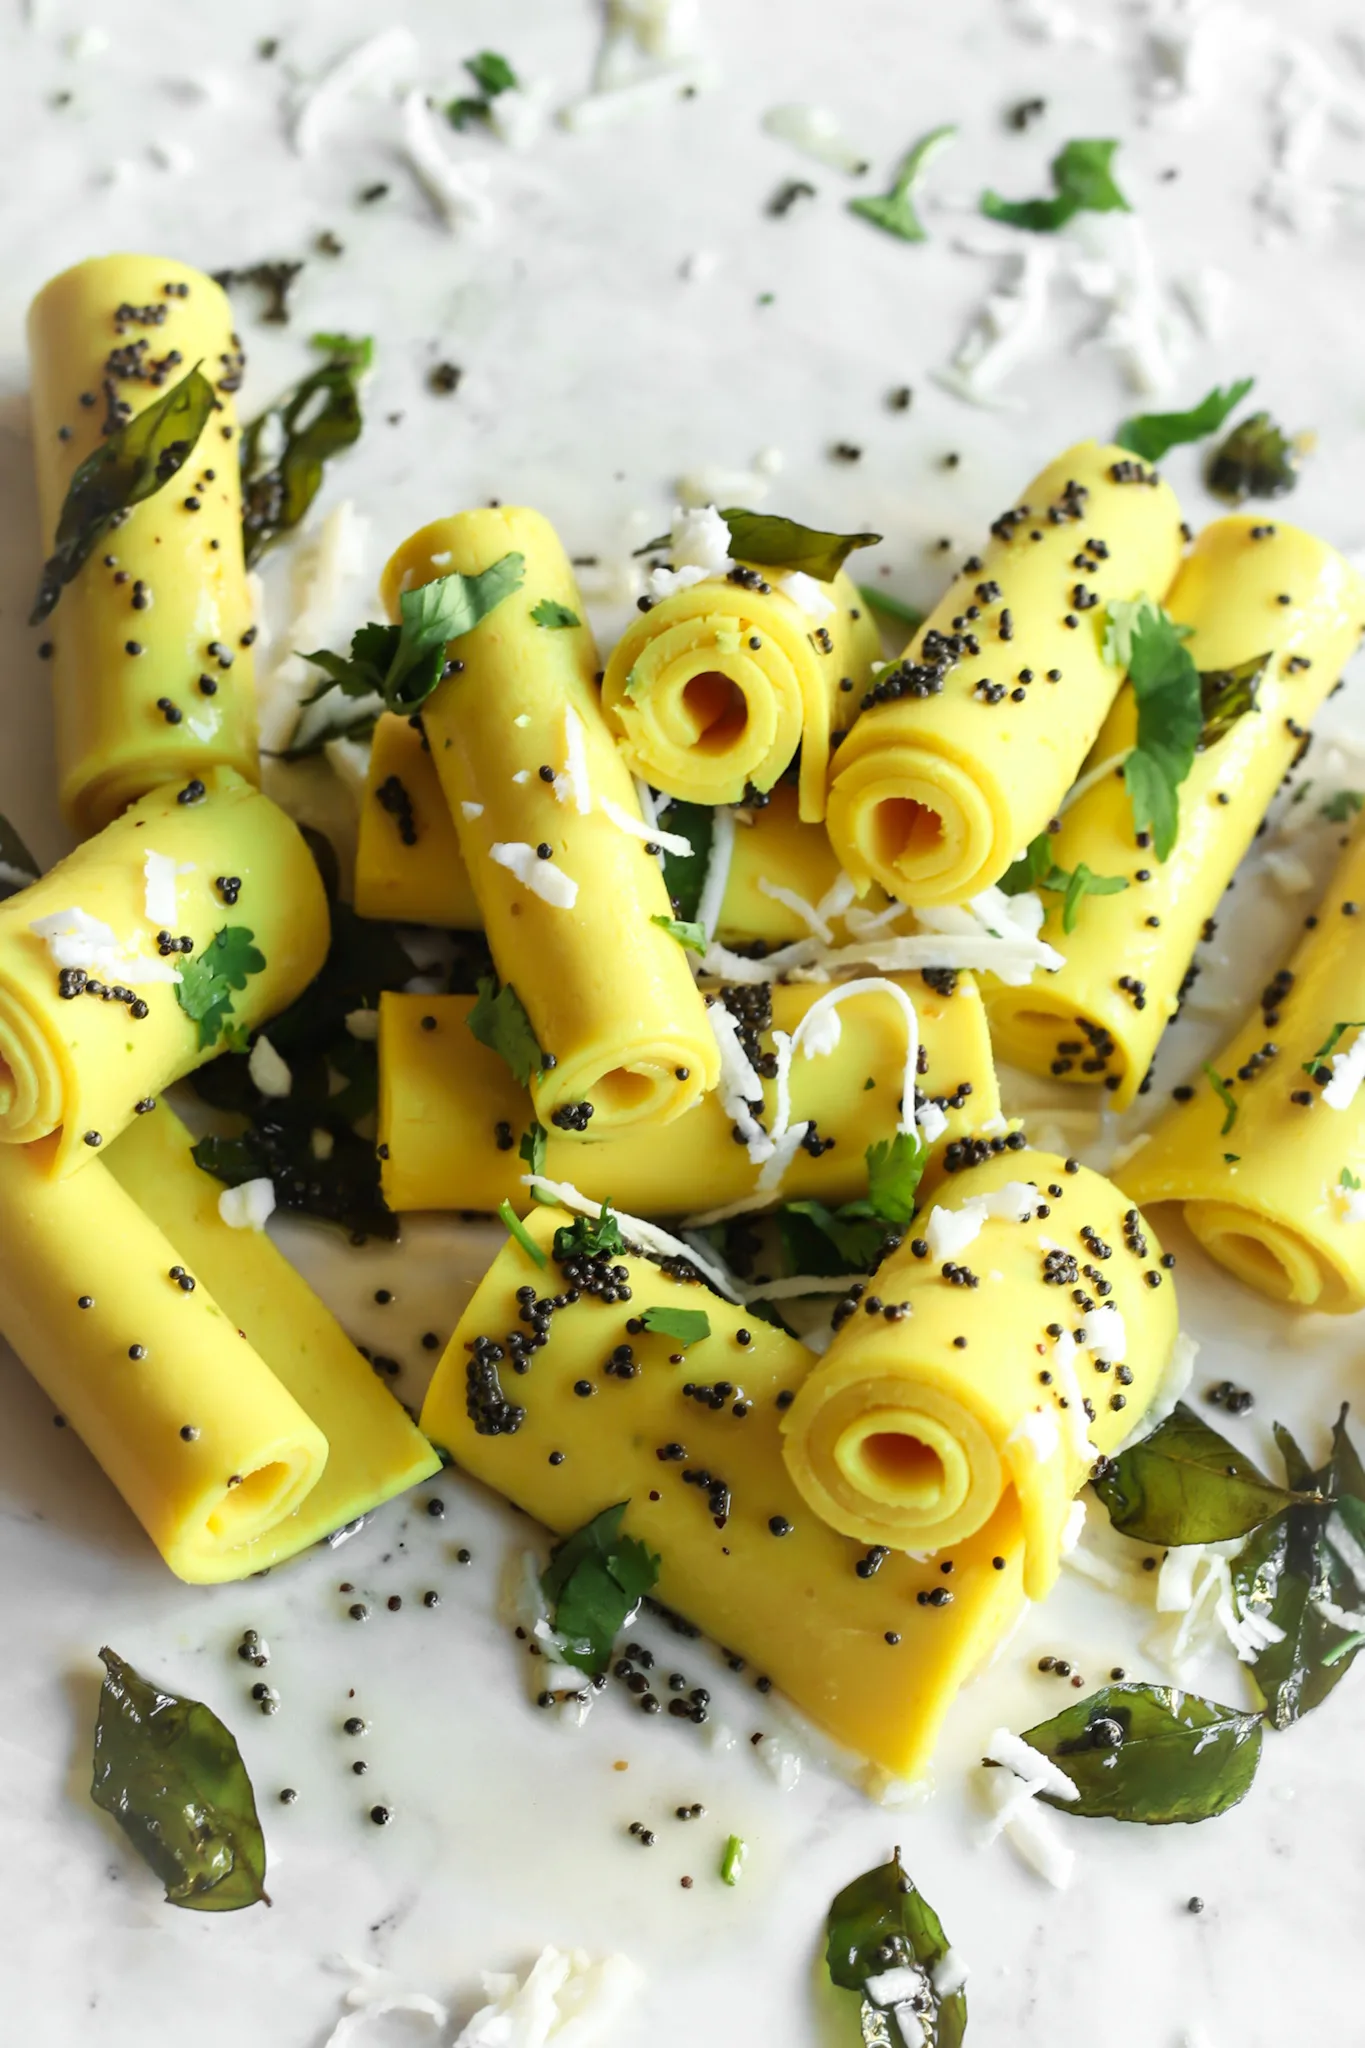
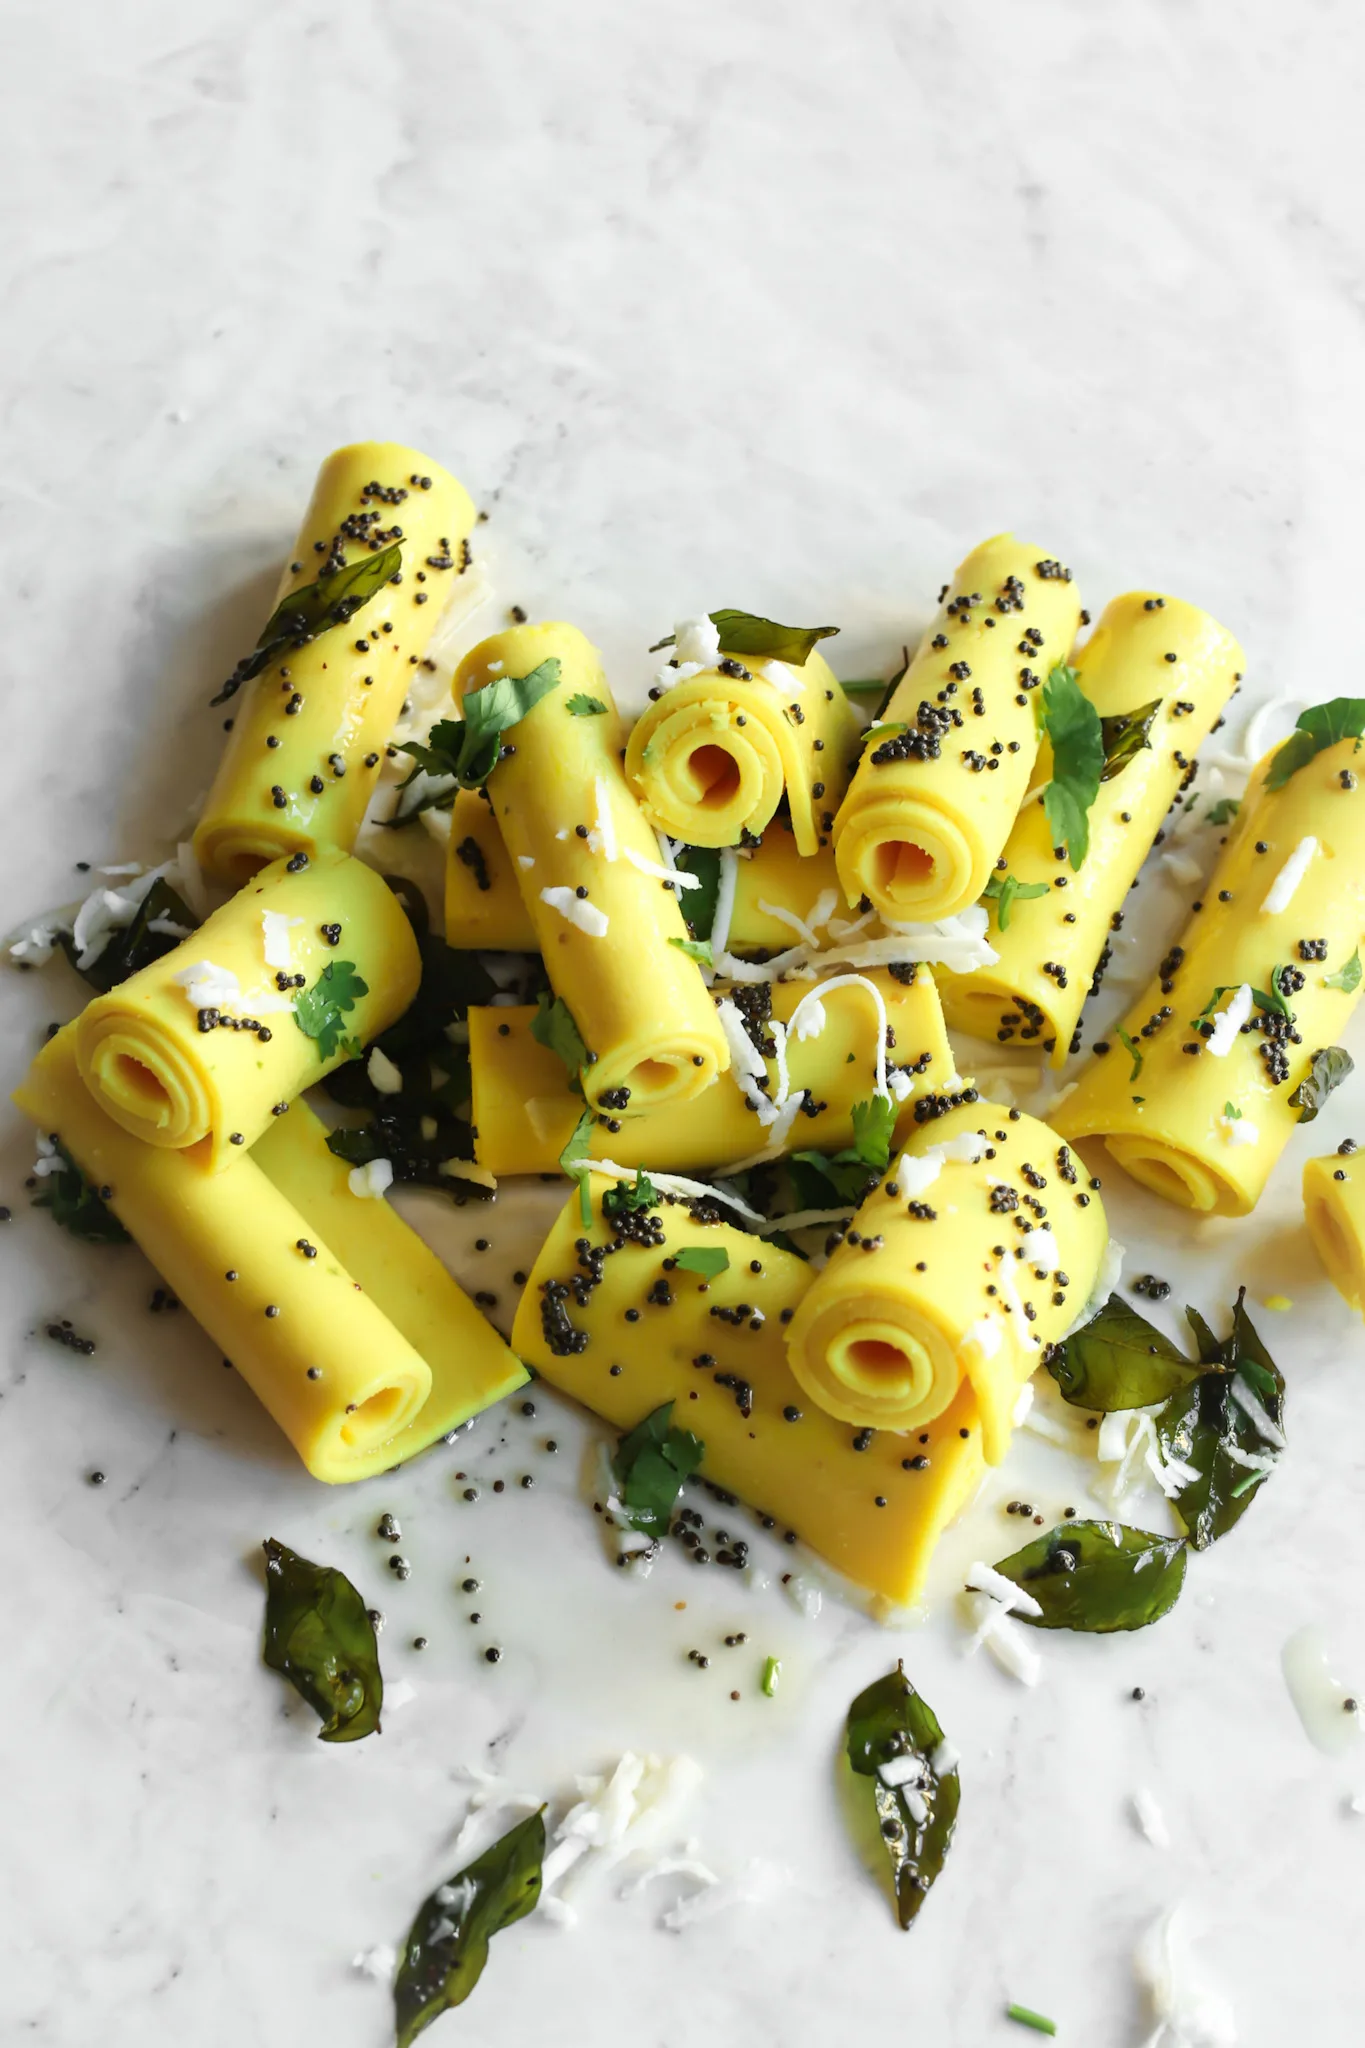
Gujarati Khandvi (Patuli/Paturi) are tightly rolled, bite-sized snacks made using chickpea flour and yoghurt. They’re spicy, sour, slightly sweet and so delicious. Khandvi (ખાંડવી), also known as Patuli/Paturi is a popular vegetarian snack from Gujarat, western India.
Serve with chai for a tasty breakfast or snack. In Marathi they are known as Surali Vadi or Suralichi Wadi.

What is Khandvi?
Gujarati Khandvi (Patuli/Paturi) is a village-style rolled snack, resembling pasta in appearance but absolutely different in flavour and texture. It’s made with chickpea flour and yoghurt and is always served with a tempering of mustard seeds and curry leaves. Other additions to the tempering are chillies, sesame seeds and asafoetida.
Fresh coriander leaves and shredded coconut are the most traditional garnishes. The sound and smell of the smoking oil hitting the smooth surface of the Khandvi is etched into the memory of almost all Gujaratis.
Why we love Gujarati Khandvi (Patuli/Paturi)
I love Khandvi it because it requires very few ingredients to make and it’s also one of those rare Gujarati naasto dishes (tea-time snacks) that isn’t fried. As much as I adore Bateta Vada (fried spicy potato balls), I know it’s not a treat I’ll scoff every day. These on the other hand, I’d go for Khandvi any time, any day.
All you need are a few store cupboard ingredients, plain yoghurt and water. Simple.
What sets this recipe apart from the rest?
Learn to make delicious Gujarati Khandvi (Patuli/Paturi) and pick up some amazing grandma-style tips from me along the way. I’ll show you how to make a tasty batter that’s lump free and easy to spread.

What’s your magic ingredient?
Psst… Don’t tell anyone but I like to add a splash of coconut water to my Khandvi batter for another incredible dimension of flavour. However, this is a completely optional addition. Indeed, you can replace coconut water for the same measure of regular water without any problems.
How to serve Khandvi
Serve this comforting Khandvi either hot, cold, or at room temperature with your favourite chutney and/or masala chai.
What equipment do I need for making Gujarati Khandvi (Patuli/Paturi)?
Nothing too fancy. Here are some things I use:
- Stick blender or jug blender (it’s not imperative to have either of these – you can always use a hand-held whisk).
- Large saucepan. Any will work but a non-stick pan is handy.
- Hand-held whisk. Metal or silicone. This recipe requires the batter to be beaten/whisked during the cooking process. Note: If using a non-stick pan, it’s best to use a silicone spatula to avoid scratching the pan’s non-stick coating. If you only have a metal whisk, use a stainless steel pan and be sure to whisk well to avoid any batter burning on the base of the pan.
- Aluminium foil or 3-4 large stainless steel thalis for spreading the batter. If you have neither, use a smooth, clean kitchen surface. These will all need to be greased very lightly before spreading.
- Cling film (plastic wrap). Not imperative but used in my method of spreading.
- Silicone spatula or flat-sided wooden spoon for spreading the cooked batter.
- Rolling pin (not imperative but used in my method of spreading).
- Small saucepan (any) or tadka pan for the tempering.

Tips for making perfect Gujarati Khandvi (Patuli/Paturi)
Here are some things to bear in mind when making Khandvi (grandma style) as well as some new school tips to roll your Khandvi thinly and evenly.
- Use a blender for a smooth, cohesive Khandvi batter. Lumps aren’t wanted here. Wait, are lumps ever wanted anywhere?
- Cook the Khandvi batter in a non-stick pan, low and slow. It thickens pretty quickly so you want to give yourself time to get those pesky lumps out.
- Use a silicone spatula or whisk to stir when cooking the Khandvi batter.
- Pay close attention to the consistency of the batter. It’s ready when the batter no longer falls off the spatula when lifted and begins to set on the sides of the pan. Think peanut butter consistency. To check if the batter is ready to spread, you can spread a little bit over a steel plate or piece of foil, allow it to set for a few minutes and then see if it rolls up easily. If not, cook it a little longer.
- This one is super important… You need to work quickly! Khandvi batter doesn’t wait around. Once it reaches the right consistency, it must be spread very quickly. It helps to have your foil sheets ready on the work surface before you even start cooking the batter.
- A lot of recipes call for the surface of the foil or thali you’re spreading the batter on to be greased. Do this VERY lightly otherwise the batter is going to slide around and clump up like no man’s business. This will make it impossible to spread.
- To spread the khandvi, I use a silicone spatula. Once it’s spread as evenly as I can get it (and still hot), I cover it with a piece of cling film and then use a rolling pin to roll it as thin as I can get it, about 1-2mm.
- If you have one, use a pizza cutter to slice your set Khandvi – it’s so much easier and neater than trying to use a knife.
- This recipe is for traditional Gujarati-style Khandvi and uses plain yoghurt but here is a Vegan Khandvi recipe for my vegan friends.
- Finally, serve the Khandvi at room temperature simply by themselves, with masala chai or your favourite chutney.

Khandvi Troubleshooting
Use a hand-held stick blender or blender jug to pulse until smooth. If you don’t have either, beat it vigorously with a hand whisk and strain through a fine-mesh sieve to remove any large lumps. When making khandvi without an electric whisk or blender, it’s always advisable to add the liquid ingredients to the dry ingredients gradually, whisking all the time to avoid lumps.
Beat vigorously with a hand whisk. If this isn’t working, transfer the mixture to a blender jar and add no more than 50ml water. Blend until smooth and then cook, whisking all the time until a smooth, thick, peanut butter-like consistency is achieved.
You can lightly grease 3-4 large inverted steel thalis (spread a small amount of oil on surface, bottom-side up) and use a silicone spatula or wooden spatula to spread the hot mixture as thinly as possible. If you don’t have steel thalis, spread it directly onto a clean, smooth worktop that’s been very lightly greased with oil.
To check if the batter is ready to spread, you can spread a little bit over a steel plate or piece of foil, allow it to set for a few minutes and then see if it rolls up easily. If not, cook it a little longer.
To test if the Khandvi batter is ready, spread a thin layer onto a thali or the back of a spoon and allow to cool for 2 minutes. If the batter peels away neatly, the mixture is ready.
You can blend the batter up to 24 hours in advance. Keep it covered in the fridge for cooking later. Some may settle at the bottom of the bowl so give the mixture a good whisk before using.
Yes. Khandvi freezes well. To freeze Khandvi, arrange the rolls in a single layer inside a freezer-safe container. Freeze for up to 3 months.
Defrost at room temperature and then microwave on high power for 1 minute.
You can find my recipe for vegan Khandvi here.
Yes. My recipe for Khandvi is gluten free. However, some recipes call for asafoetida which is often blended with wheat flour. If using asafoetida, check it is a gluten free blend.
Watch my recipe video for making perfect Khandvi. I have lots of tips for getting a nice, even spread very quickly.


Ingredients
For the khandvi:
- 140 g chickpea flour
- 220 g plain yoghurt
- 120 ml coconut water not coconut milk
- 120 ml cold water
- 2 tbsp lemon juice
- 1 tbsp grated ginger
- 1 green chilli very finely minced
- 1 tsp salt
- 3 tsp sugar
- 1/4 tsp ground turmeric
For the tempering:
- 2 tbsp sunflower oil
- 2 tsp mustard seeds
- 10-12 curry leaves
- 2 tbsp fresh or desiccated coconut
- 2 tbsp chopped coriander leaves
Instructions
To make the khandvi:
- Blend all the ingredients for the khandvi rolls together to make a smooth paste. I used a stick blender but you can also use a blender jar or whisk everything until there are no lumps.
- Place one large sheet of aluminium foil on a heat-resistant surface (about 1M long) and grease with oil VERY lightly.
- Pour the batter mixture into a non-stick pan and cook it over a low flame for 10-12 minutes, until it's the consistency of thick, smooth peanut butter. Keep stirring constantly to stop it from settling at the bottom and creating unwanted lumps. I find the best tool for this is either a silicone whisk or silicone spatula. Towards the end of cooking you will need to beat the mixture vigorously to maintain a smooth texture.
- Working very quickly, spread the cooked batter on top of the first sheet of foil. Spread it thinly and evenly using a silicone spatula. Place a piece of cling film on top. Use a rolling pin to roll the dough evenly between the cling film and foil. It should be 1-2mm thick. Allow it to set for 5 minutes.
- Carefully remove the cling film. Use a pizza cutter or sharp knife, trim away any scrappy, uneven edges (those are for you to enjoy). Slice the Khandvi into long strips, all about the same width (3-4cm in width and 12cm in length is ideal). Use your fingers to roll them up tightly. Repeat for all the Khandvi sheets and arrange on to a platter or plate.
For the tempering:
- Heat the oil in a small pan. Add the mustard seeds and allow them to crackle. Next, add the curry leaves and sizzle for 10 seconds. Pour this over the rolled Khandvi. Garnish with chopped coriander and grated coconut.
Recipe Video
Sanjana’s Notes
- Serve the Khandvi at room temperature.
- Refrigerate in an airtight container for up to 3 days.
Pin it for later

If you like this, you’ll love my recipe for Gujarati Khaman (Dhokla)


Discovering the Vibrant Flavors of Traditional Gujarati Cuisine - Food and Travel Utsav
Saturday 20th of April 2024
[…] source […]
Perfect Chakri - Sanjana.Feasts - Indian Snacks + VIDEO
Wednesday 19th of October 2022
[…] Khandvi recipe […]
Indu T
Sunday 23rd of May 2021
This is my go to Khandvi recipe - it’s just like my mom’s with actual measurements!!
Sanjana
Sunday 23rd of May 2021
How awesome to hear! Really pleased you like it!
Leanne Naish
Tuesday 22nd of December 2020
Wow I love the look of this recipe. Can I ask though, I have never seen coconut water added before. What is its purpose?
Sanjana
Saturday 22nd of May 2021
Hi. It adds extra flavour!
Ashok
Wednesday 30th of September 2020
Thanks guys, Your recipe was too fantastic it. Me and my family loved it. I will definitely share your recipe with my friends.